These rules are no longer being updated as I have developed a second version, also available on this blog. I'll leave these here for interest though.
More a set of guidelines than rules, here are some jottings about the way I am refighting napoleonic battles with 6mm figures. Think of this as an ongoing work-in-progress that will be added to and amended in the light of further experience.
A. Organisation and Basing
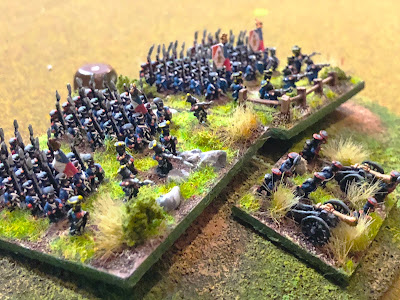
Infantry and cavalry are each based on 60mm square bases. A base represents around 1000-1500 cavalrymen or 2000-3000 infantrymen and the exact ratio will vary from scenario to scenario without worrying too much. I call these "brigades" whatever the exact terminology for the specific nation.
Foot artillery are mounted on 40mm wide bases and horse artillery on 30mm wide bases. My artillery bases are 30mm deep but this could be extended if you like to model limbers etc. Bases represent 12-20 guns in most cases
Generals are mounted on 30mm square bases, including an ADC or two. Base these how you like so long as you can identify which is which.
Armies are divided into a number of "commands" each led by a general. The army will also have a commander-in-chief. Commands may be composed of any number of brigades and artillery bases. Depending on the battle fought a command will typically represent a large division or a corps.
Infantry are assigned three values (represented by dice of different sizes from d6 to d12): Skirmishing, Quality and Morale.
A typical Austrian brigade may rate as d6, d8, d8. One with additional grenzers may be d8, d8, d8 and a veteran brigade might be d6, d10, d10. Usually quality and morale will be the same but there might be occasions where a scenario will work better if they differ. Higher dice represent better ability so a French brigade will typically have a d8 or d10 for skirmishing. Exact values will depend on the scenario being played and the players' own views. Try to restrict the use of d12s to really, really, elite units!
Cavalry are similarly rated for Quality and Morale
Artillery are rated for Morale
One turn represent about 1 real hour.
B. Terrain
I game using 2 foot square terrain tiles. Each of these is divided (mentally or actually marked) into 9 equal squares in a 3 x 3 grid. Thus a 6 foot x 4 foot battlefield will be 9 squares wide and 6 squares deep - a total of 54 squares. A square represents an area of roughly 1km x 1km.
Terrain is placed in squares and it should be clearly identified which squares do and do not contain hills/woods/etc. This terrain affects any units than move into the square. Towns are also placed in squares but in most cases can only be occupied by a single unit in the square. Other units may enter the square but are not considered to be "in" the town.
A square can be occupied by a maximum of four brigades and two artillery. Additional artillery may be accomodated by reducing the number of brigades but the total units in a square may not exceed 6. Any number of generals may be present in a square. Only units/generals of one side or the other may occupy a square at any one time.
C. Turn sequence:
- Determine action dice available for the turn
- Dice-off between opposing generals for first available action die
- Winning general activates his command, and completes movement, bombardment and assaults
- If both sides still have generals who have not yet activated then select two opposing generals who have not yet acted and return to step 2.
- Once one side's generals have all activated any remaining action dice are allocated to inactive generals on the opposing side to use on their commands
- Once veryone has acted start a new turn and return to step 1
Count up the number of commands on both sides (i.e. number of generals NOT including CinCs). In the basic version of the rules roll this number of d3 (dice numbered 1,1,2,2,3,3). I have considered experimenting with varying the number and type of dice but not yet tried this out. Arrange the dice in order, largest first.
C2. Dice-off
Each side nominates a general to compete for the highest available action die. Each general rolls a die of a type determined by his quality (d6, d8, d10 or d12). Larger dice represent more able generals. The highest rolling general gains the action die. In the case of tie the winner is the general with the largest command die (i.e. d10 rolling "7" beats a d8 rolling a "7"). If this is still tied because both generals rolled the same score on the same die-type then both sides roll again until a winner is produced.
The winning general will then be able to act with 1, 2 or 3 actions depending on the action die "won" and now activates his command (see below). Once he has completed his actions then if both sides still have generals who have not acted then return to this section.
At the start of turn (i.e. before ANY generals have tried to win action dice) the commander in chief for each army may move up to 4 squares to join one of his subordinates. The subordinate must then use the CinCs die-type when rolling to win an action die.
EXAMPLE:
It is the start of a new turn. The Austrian army has two commands and the French have four. Six d3 are rolled to produce the action dice and come up 3, 2, 2, 2, 1, 1. For the scenario being played, Austrian generals ar rated at d8 quality and French at d10.
The first available action die is therefore a "3" and there is a dice off between one of the Austrian commanders (d8) and one of the french commanders who uses a (d10). The Austrian scores "5" and the Frenchman "7" so the french commander gets use of the action die so may activate his command to perform 3 actions.
Once this is completed the next action die (a "2") is competed for by one of three French generals yet to activate and one of the two Austrian generals (either the one who failed previously, or his colleague)
C3. Actions
Once a command is activated each unit in that command may perform a number of actions determined by the action die won by the command's general. These actions may be used to move, bombard with artillery, or launch an assault. The actions relate to each unit in the command, so an action die of "3" allow EACH unit to expend up to three action points.
C3.1 Movement
Movement from one square to an adjacent square costs one action point. Movement may be orthagonal or diagonal. A second or more diagonal move will however cost 2 action points.
Movement into a square containing woods, hills, etc will cost one additional action point. Cavalry moving into a woods square must end their actions.
Movement into a town within a square will cost one additional point. Only infantry can occupy a town.
Crossing a river within a square or between two squares will cost one additional point
Launching an assault into an adjacent square will cost 2 action points (therefore commands with only ONE action may not launch assaults this turn)
Light cavalry who move but do not launch an assault may take one action more than indicated on the action die
C3.2 Bombardment
Bombardment is the use of one or more artillery bases to attack an enemy occupied square. Bombarding an adjacent square is described as "close range". Bombarding an enemy across one intervening square is described as "long range". Long range is the maximum possible bombardment distance.
Bombarding artillery bases each roll one die per action point expended on bombardment. The type of die will depend on the artillry type and range:
Foot artillery: d8 at long range, d10 at close range
Horse artillery: d6 at long range, d8 at close range
In all cases hit is scored by any rolls of 5+
If the target is a woods square then hits are scored on 6+
Target infantry occupying a town may try to avoid casualties. They roll one d8 per hit and ignore one hit for every roll of 5+ (the die type may be varied within a scenario depending on the nature of the buildings represented)
Foot artillery cannot combine movement and bombardment actions in the same turn but Horse artillery can.
C3.3 Assaults
An assault occurs when one side declares that one or more squares will attack a single defending square. This may seem a fairly complex process but soon becomes second nature:
- Declare attacking brigades and whether any artillery who are present will participate
- Declare defending brigades and whether any artillery who are present will participate
- Determine if either side has a skirmish advantage
- Roll for attackers' hits on defender
- Roll for defenders' hits on attacker
- Side suffering the most hits takes a morale check. Both sides check after a drawn combat
- Winner may perform counterattack/breakthrough attack
Let's take these one at a time:
C3.3.1: The attacker may declare which one or two specific brigades will assault out of the square. If the attacker also has brigades in other squares adjacent to the defenders then each such square may also contribute one brigade to the assault. If the assulting square contains artillery then the attacker must declare which (if any) will participate in the assault: this will strengthen the assault but exposes the artillery to potential damage.
C3.3.2: The defender declares which one or two brigades from the defending square will fight in the assault. If the defending square contains artillery then the defender must declare which (if any) will also participate: this strengthens the defence but exposes the artillery to potential damage.
Foot artillery who bombarded cannot participate in an attack but can defend.
C3.3.3: Determine if either side has a skirmish advantage. Infantry bases fighting in an assualt when there are no enemy cavalry in adjacent squares roll one die of a type determined by their skirmish rating. Each side takes its highest single die roll and compares it to the the enemy's highest. The higest-scoring side has the skirmish advantage. If one side is able to make a roll and the other not (e.g. due to cavalry) then the advatange is won automatically. If cavalry is present on both sides then there are no rolls and no advantage is gained by either side.
C3.3.4: Attackers roll for hits: Each brigade roll 2 dice of the type determined by their quality*. Each participating foot artillery rolls a d12 and each participating horse artillery rolls a d10. In all cases hits are scored on a 5+ (if the opposition have skirmish advatage then this becomes 6+). Share hits inflicted among participating defending brigades/artillery, defender's choice
* In woods, infantry and mixed units use their skirmish die type rather than their quality type, cavalry still use their quality type. Cavalry and mixed brigades roll just one die however, so are at a disadvantage in woods. Artillery may not participate in combat if in woods. [changed 17 Feb 12].
C3.3.5: Defenders roll for hits in the same way, with the attacker choosing how to fairly distribute any hits suffered by participating attacking brigades/artillery.
C3.3.6: Morale checks are now taken by participating units on the losing side who have any hit markers. If the combat was drawn then both sides test. Testing brigades roll one die (morale type) for each hit the brigade/artillery has accrued so far in the game. Rolls of 5+ PASS and 4 or less FAIL. one fail causes a brigade or horse artillery to retreat to an adjacent square to its rear. One fail will destroy a foot artillery unit. Two or more fails will destroy any unit. If more than half of the units [even if they did not participate] in an OPEN square retreat or are destroyed then the remaining units in the square must retreat; otherwise the retreat of surviving units is optional at the choice of the player. A unit compelled to retreat but unable to do so must take one additional hit and recheck its morale (it may ignore a second retreat result).
C3.3.6a: Units on hills or in towns roll one fewer dice than normal when testing morale, giving them a better chance of a good outcome. [added 17 Feb 12]
C3.3.7a: If the ATTACKING side has brigades in the assaulting square (not supporting squares) who did not initially participate AND the opponent has units remaining in the defending/assaulting square, then they may now declare a counterattack/breakthrough and a second assault round is fought (return to C3.3.4). Again, two brigades can be selected and at least one must be a brigade that did not fight in the first round. A brigade fighting a subsequent round only gets to roll ONE die not the usual two. Artillery may choose to participate again and there is no change to the skirmish advantage determined earlier.
C3.3.7b: If the ATTACKING side does not have a fresh brigade to launch a second round of assault then the defender may launch a COUNTERATTACK if he has at least one brigade in the square who was not involved in the first round. The combat is fought in the normal way and artillery may participate. There is no change to any existing skirmish advantage.
C8. SAVES: In some circumstances units suffering hits may try to avoid them:
Infantry attacked by only cavalry may roll one die (quality) for each hit inflicted and ignore one hit for each roll of 5+. This save cannot be made if the attackers include any infantry but is not blocked by artillery.
Infantry defending a town may roll one die (quality) for each hit inflicted and ignore one hit for each roll of 5+
C9. REROLLS: In some circumstances units which fail when rolling to score hits may reroll their misses:
Heavy Cavalry who are attacking may reroll any of their dice in the combat which initially fail to score a hit.
All infantry and artillery units who are defending and uphill of their attackers may reroll any dice in the combat which initially fail to score a hit. [added 17 Feb 12]
C3.4 Rallying: Troops who have taken hits may try to rally and recover some of these to reduce their risk of being destroyed in combat. There are two types of rallying: Battlefield rallying occurs during the normal game sequence as an action alongside movement, bombardment and combat. Overnight rallying occurs between days in battles lasting more than one day.
C3.4.1 Battlefield rallying takes all of a unit's actions for the turn (whether the action die shows 1, 2 or 3 actions). Units with 2 or more hit markers roll 1die of a type determined by morale and pass on a 5+. A pass allows the removal of ONE hit marker. Units may not remove their final hit marker by battlefield rallying. A unit can only attempt to rally if there are no enemy units in any of the eight adjacent squares at the time.
C3.4.2 Overnight rallying occurs as follows. Units with one hit marker have the hit marker removed. Units with two or more hit markers have all but one marker removed. No die roll is necessary and troops may be adjacent to the enemy. This can only occur during "night" periods between the days of a multi-day battle. The only exception is troops who cannot form a chain of non-enemy-occupied squares from their position to their own table edge. These troops are "surrounded". Surrounded troops may attempt to rally using the battlefield rallying method.
And that is about it for now!
I'll keep adding more stuff and amending the rules as I try them more.
ACKNOWLEGEMENTS
The following people, books and stuff have inspired some of the ideas above:
Wargaming Miscellany blog by Bob Cordery - (for grids and rediscovering Joe M's rules)
Polemos Marechal de Empire (for agreeing that 60mm squares are the way to go)
Grand Armee and its fast play version (for lots of scenarios on t'web)
Volley & Bayonet (for separating morale from strength)
Impetus (roll off between opposing commanders for initiative)
Two-hour wargames (one fail fall back, two fails dead)
Napoleon at Marengo game by Bowe Simmons (for some great ideas for combat mechanisms)
Force-on-force (for the whole concept of changing the dice rather than the target number)
Kevin Zucker (for all of his napoleonic boardgames)
Baccus (for making such nice 6mm figures)
Timecast (for making buildings worth fighting for)
The Newark Irregulars (for helping test my crazy ideas)
Peter Pig (for PBI and the best ideas on how to use a gridded board)
Practical Wargaming/Charles Wesencraft (for introducing the idea of grand-tactical gaming and beating the rest of us to "elements" by several decades)
and all the others who I have forgotten...